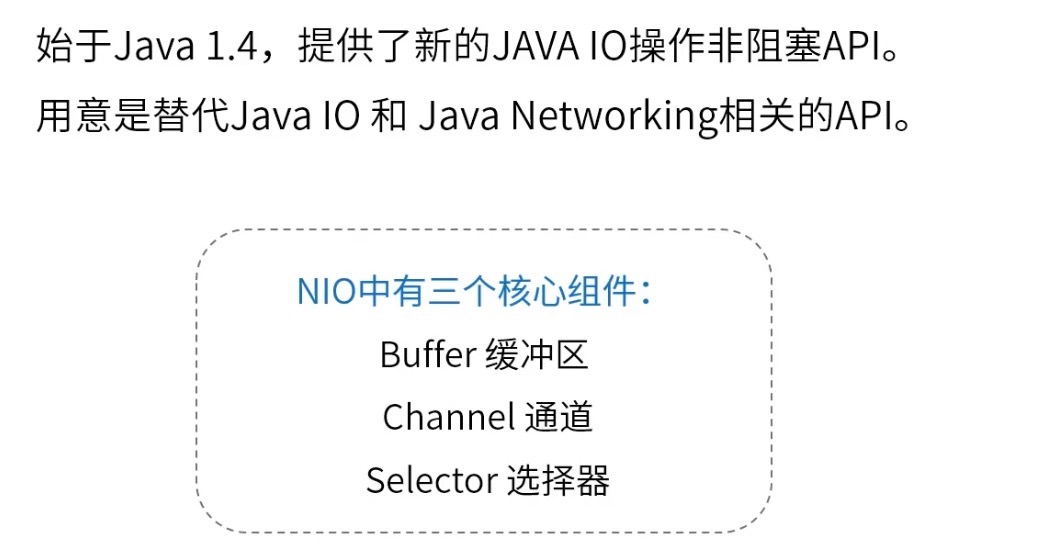
NIO网络编程
JAVA NIO
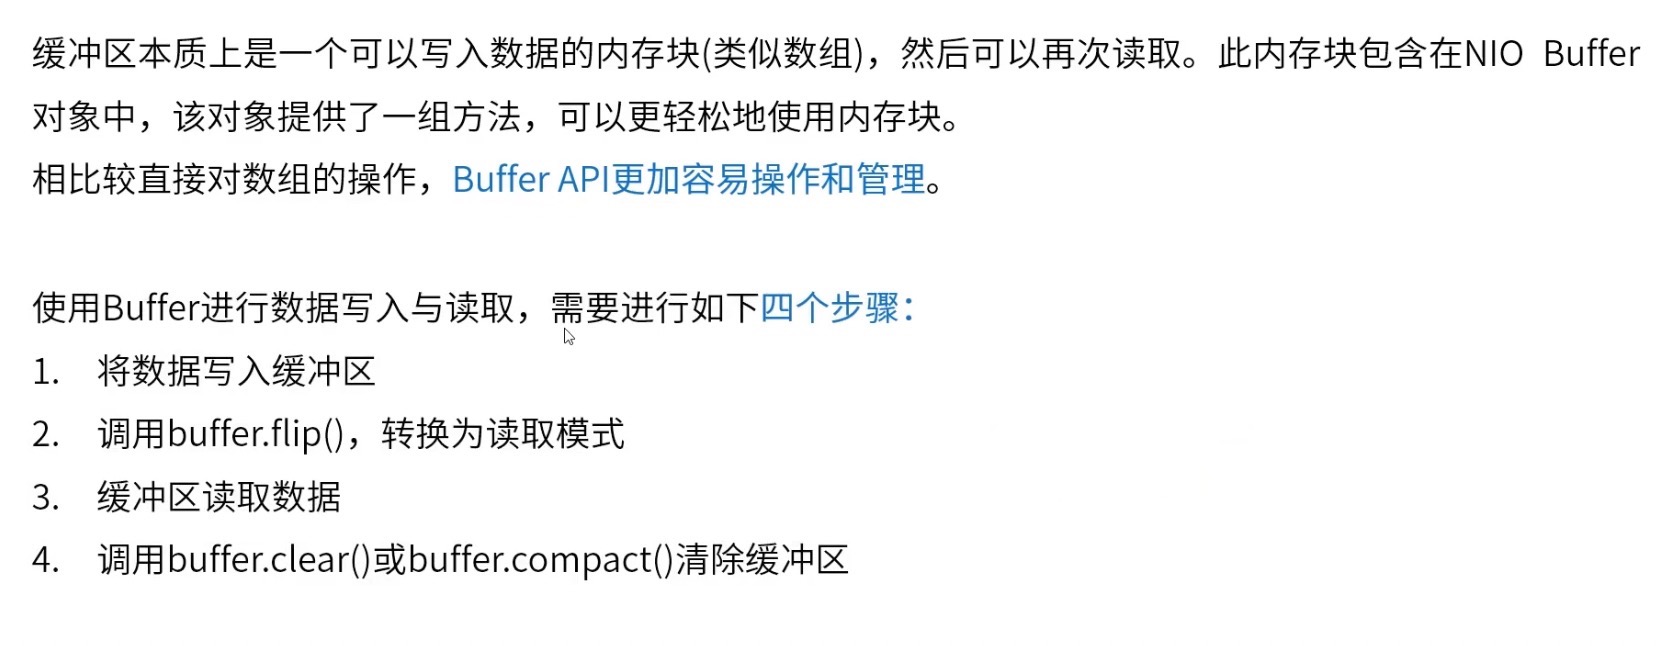
Buffer缓冲区
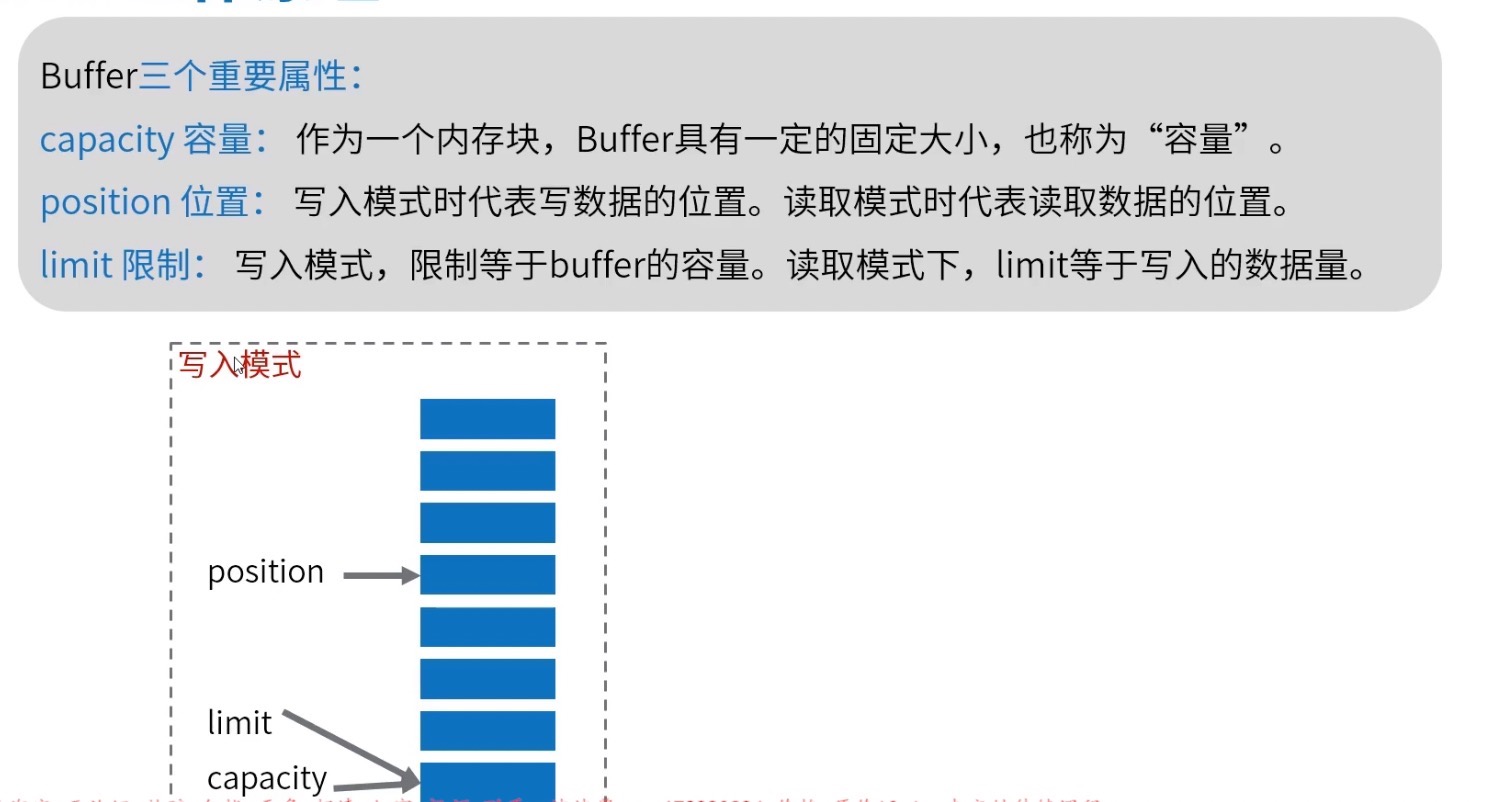
Buffer工作原理
Demo
1 | package com.study.hc.net.nio; |
console
1 | 初始化:capacity容量:4, position位置:0, limit限制:4 |
ByteBuffer 内存类型
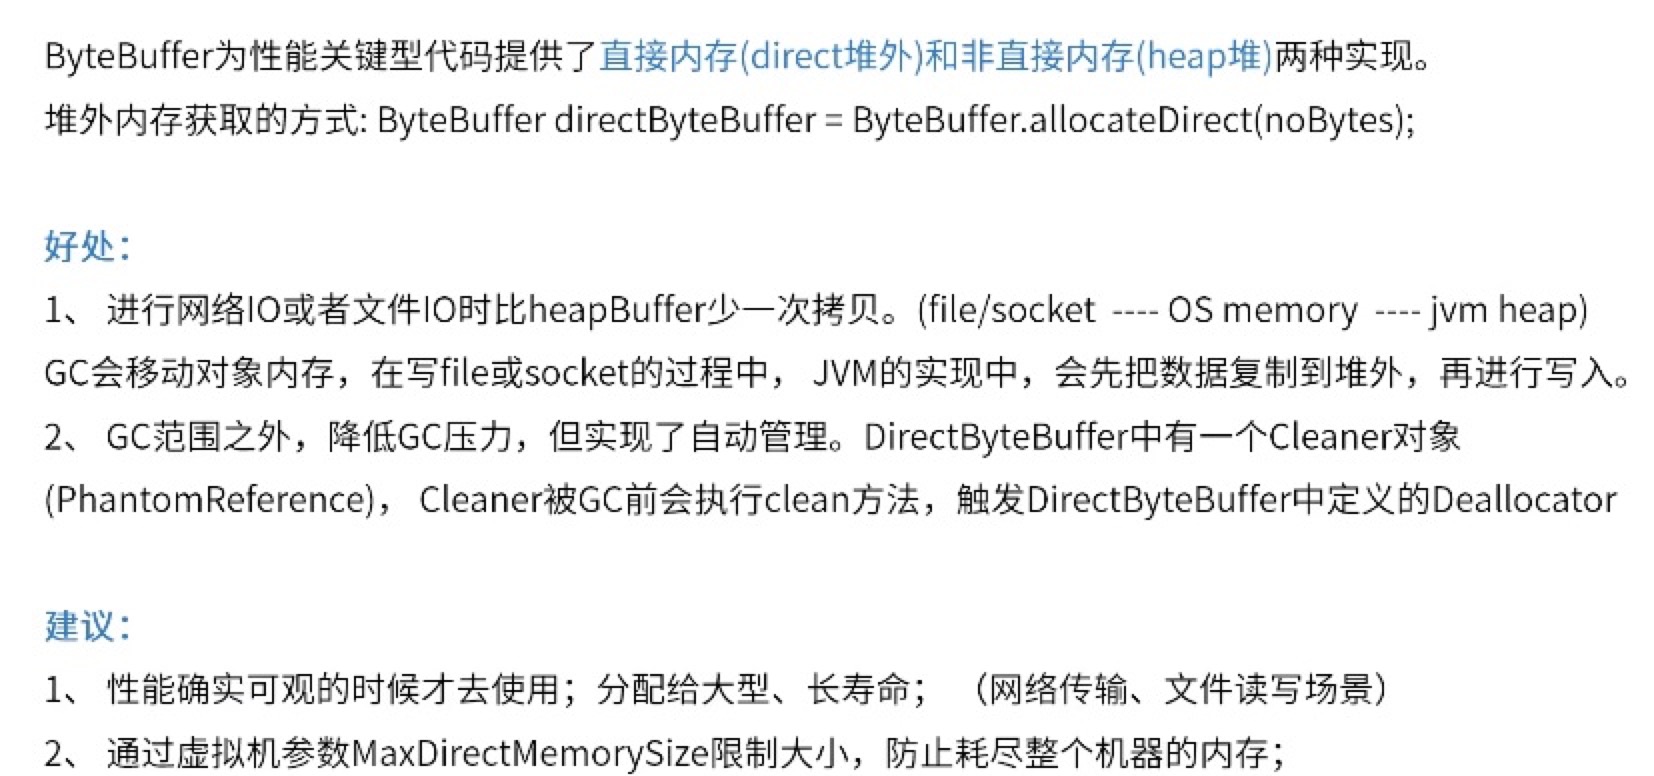
💡通过ByteBuffer.allocateDirect(4)获取的ByteBuffer是存储在堆外的,堆内的数据在写入的时候,是先将数据复制到堆外,再进行写入再同步到堆内,为什么要这样做???是为了避免出现写入一部分后,GC(垃圾回收机制)的时候移动了对象内存,例如对象a一开始位置在1,经过一次GC后移动到了2 ,而socket在网络传输的时候传的是java内存地址,而此时内存地址已经变了,就会导致数据不正确。而堆外内存是不受GC管理,是手动调用方法清除。
💡由于堆外是堆之外的,不受GC管理,很过监控工具也监控不到java堆以外操作系统的内存,若不在创建的时候限制大小,很可能在无感知的情况下耗尽整个机器内存。
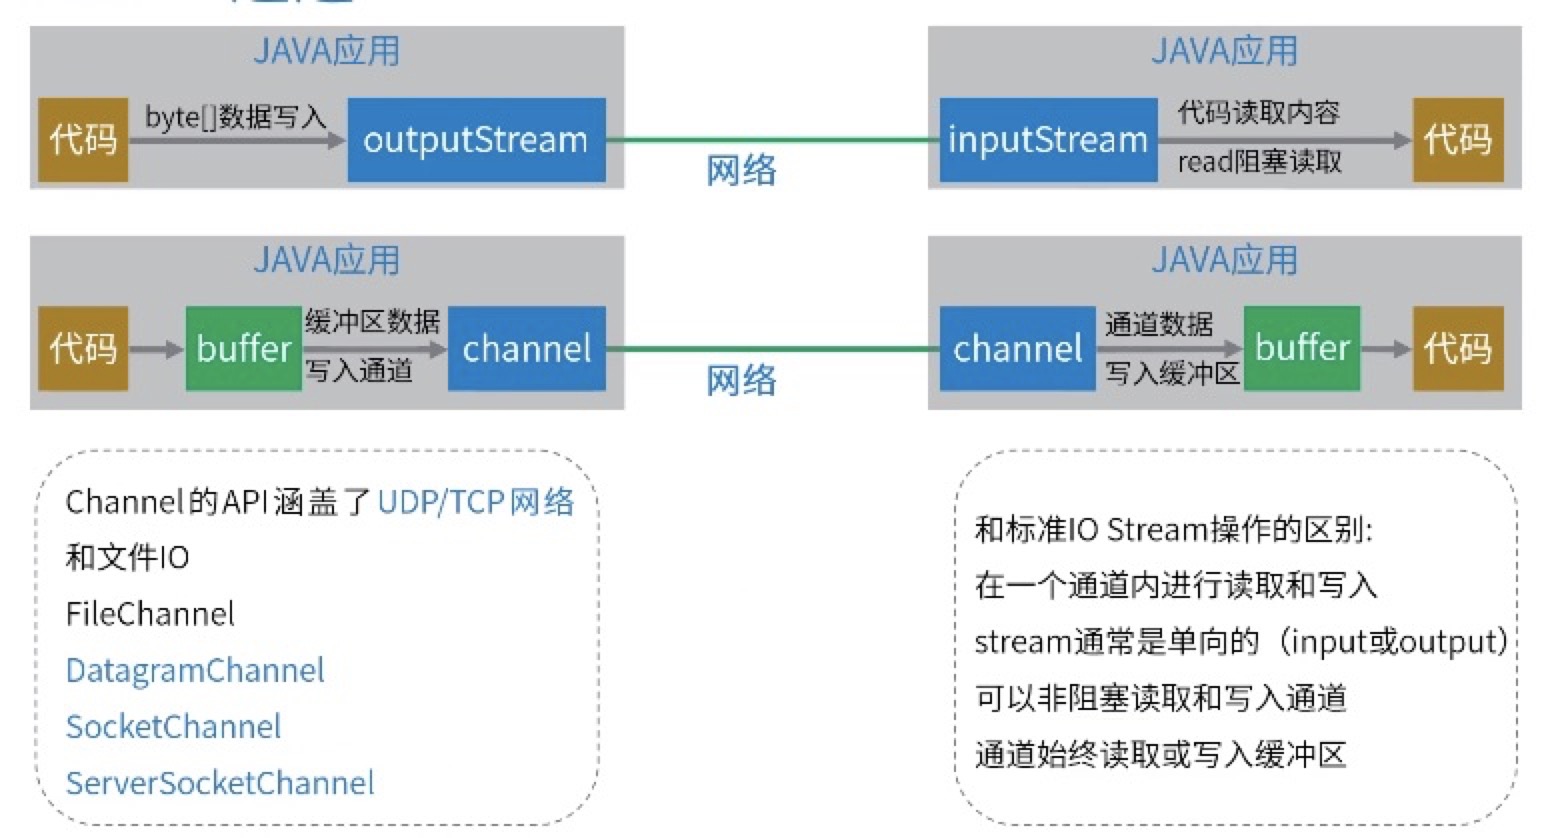
Channel通道
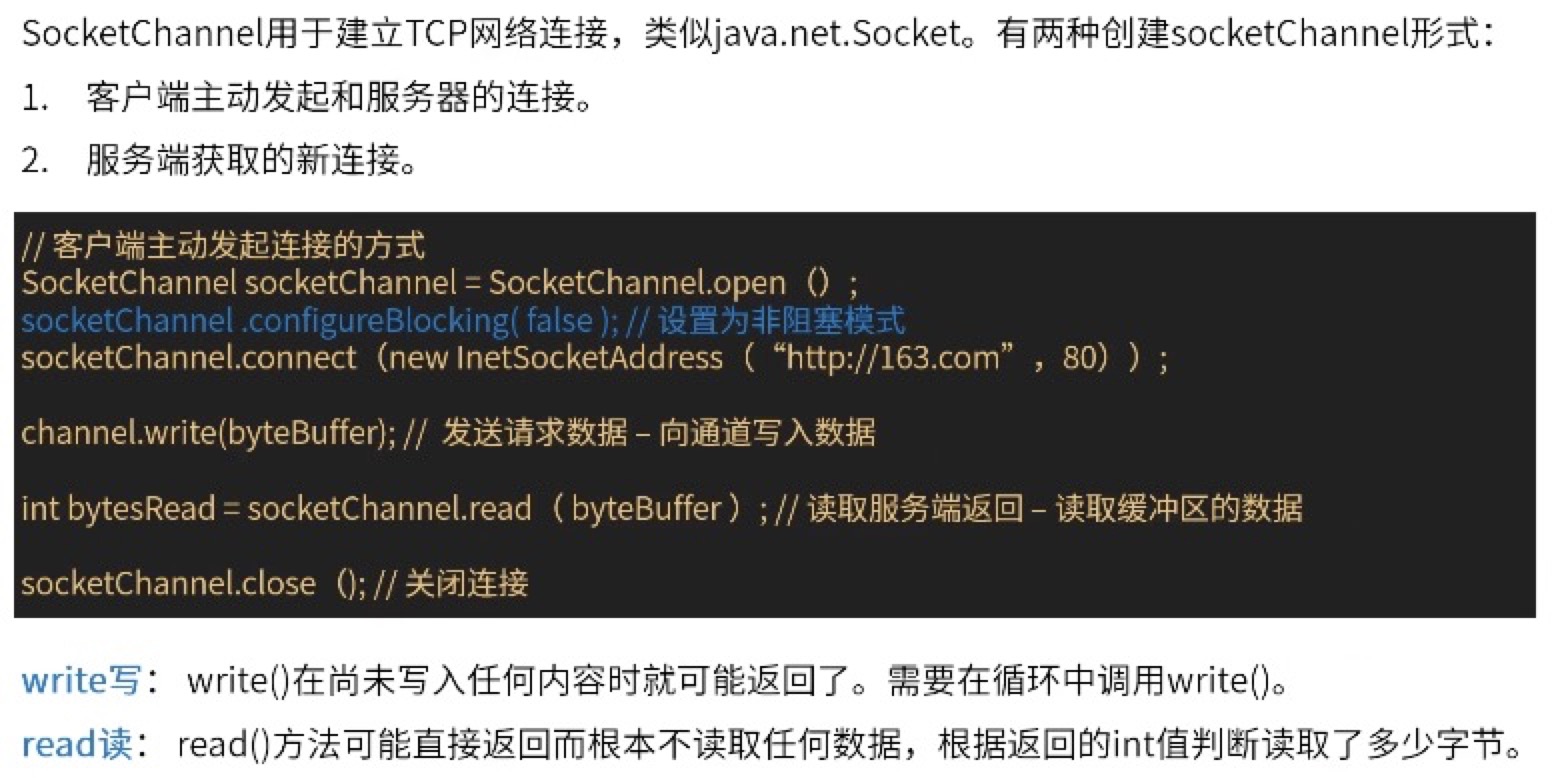
SocketChannel
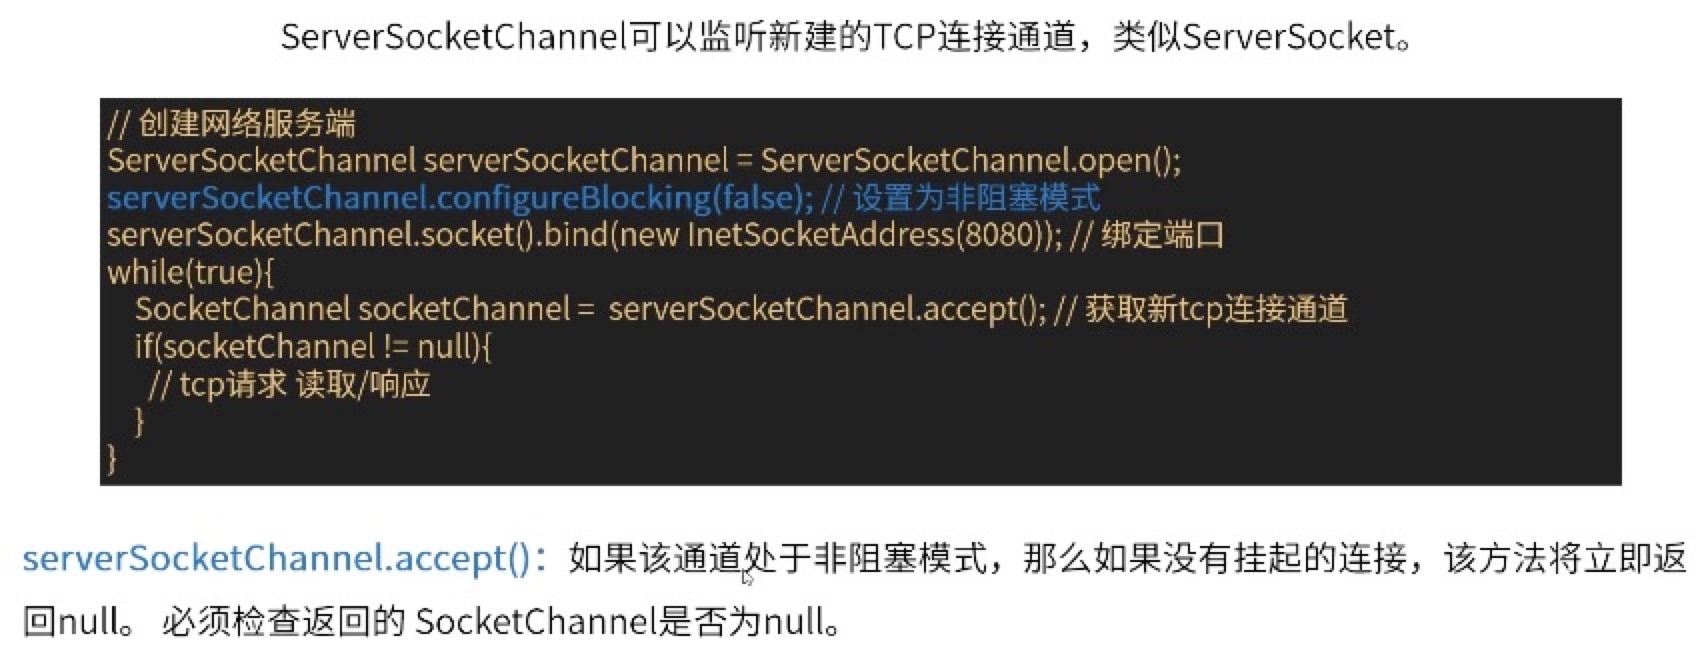
ServerSocketChannel
1 | package com.study.hc.net.nio; |
💡这种低效的循环检查,会是NIO服务端的正确开发方式吗?
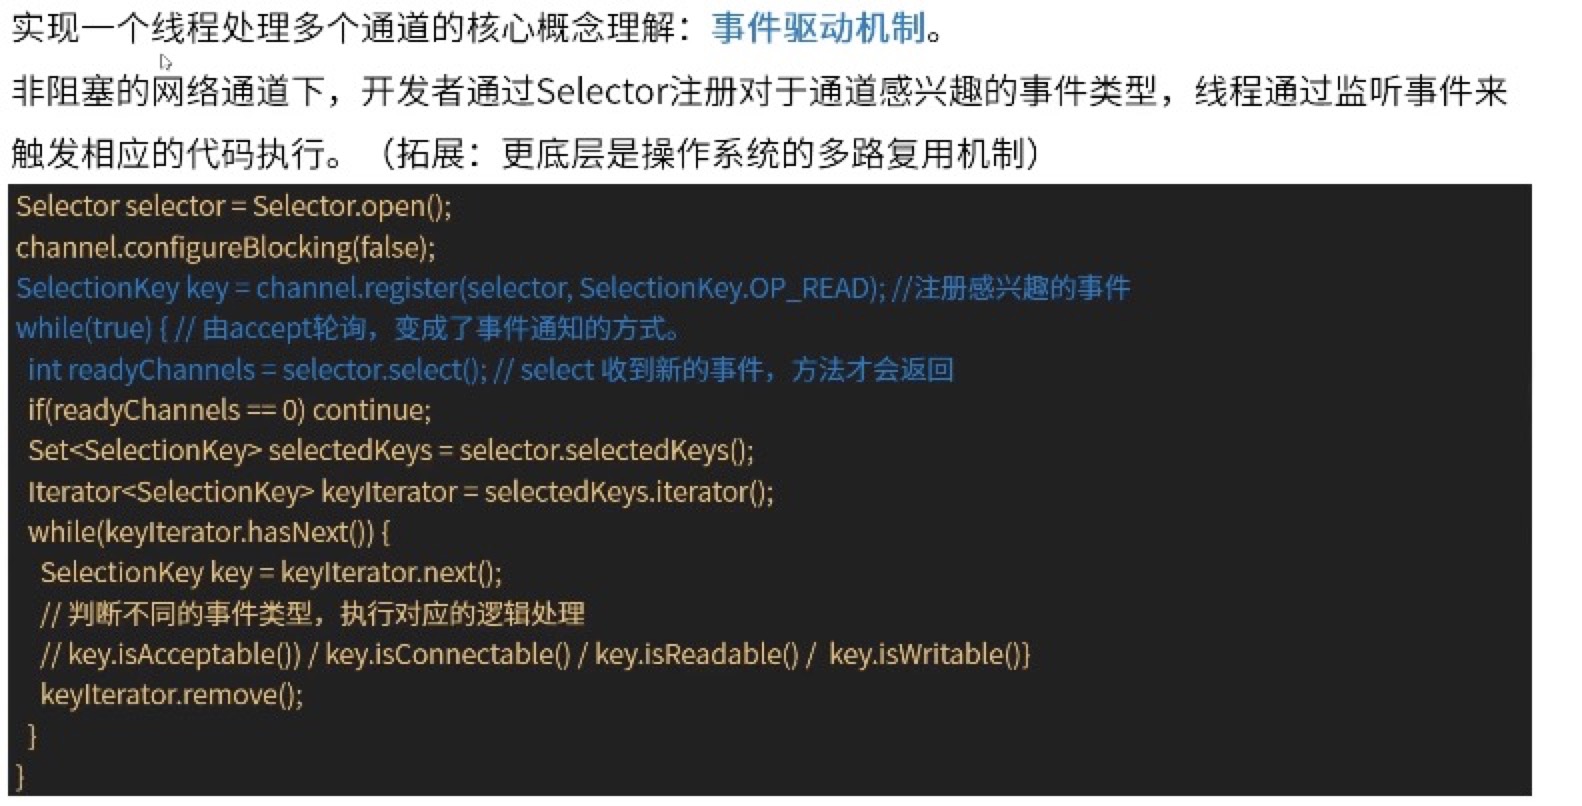
Selector选择器

1 | package com.study.hc.net.nio; |
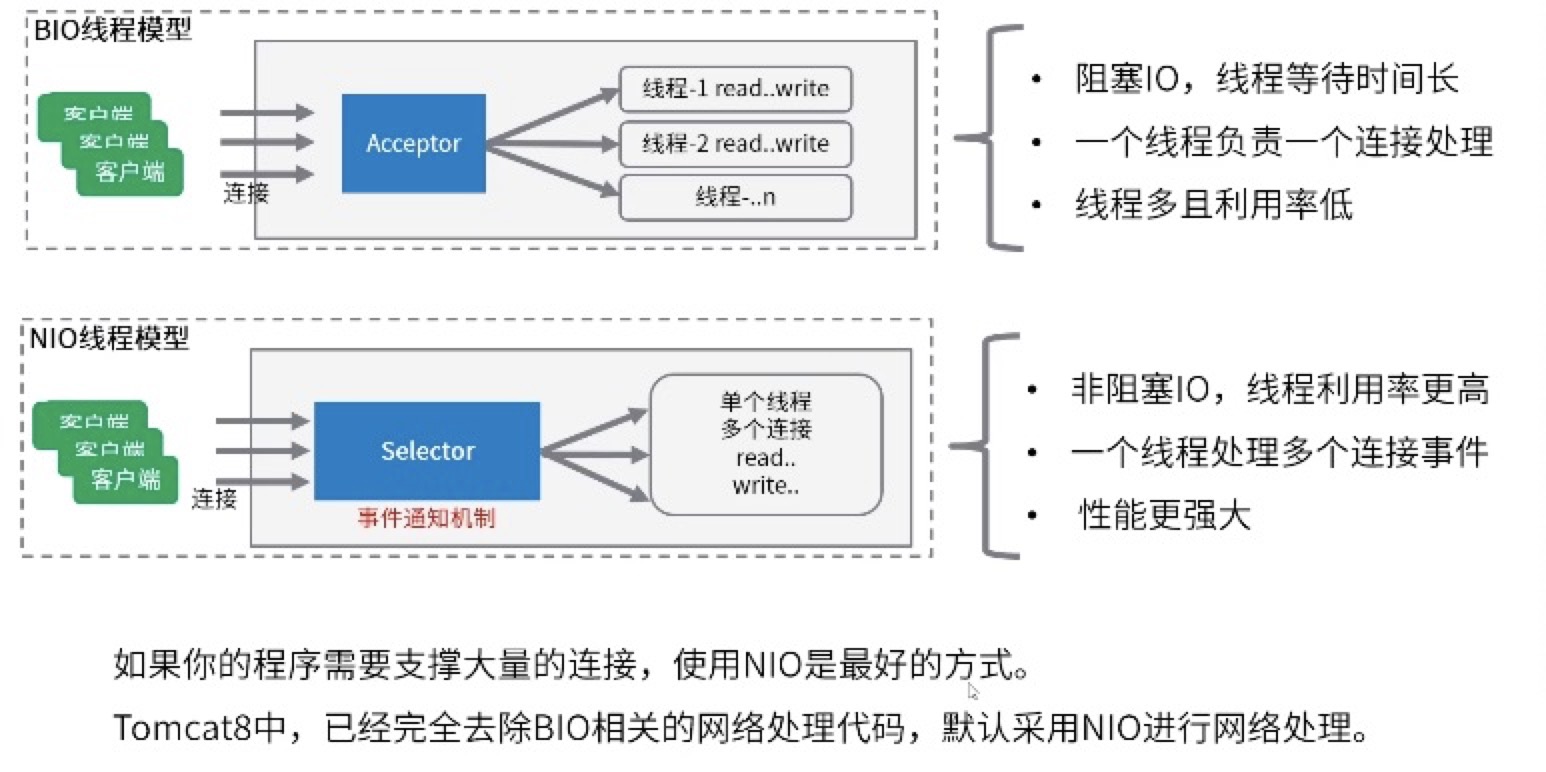
NIO对比BIO
问题: 此处一个selector监听所有事件,一个线程处理所有请求事件. 会成为瓶颈! 要有多线程的运用
NIO与多线程结合的改进方案
Doug Lea的著名文章《Scalable IO in Java》 中写出了具体如何用多线程改进NIO的方案——— Reactor
链接:http://gee.cs.oswego.edu/dl/cpjslides/nio
多路复用Reactor线程模型
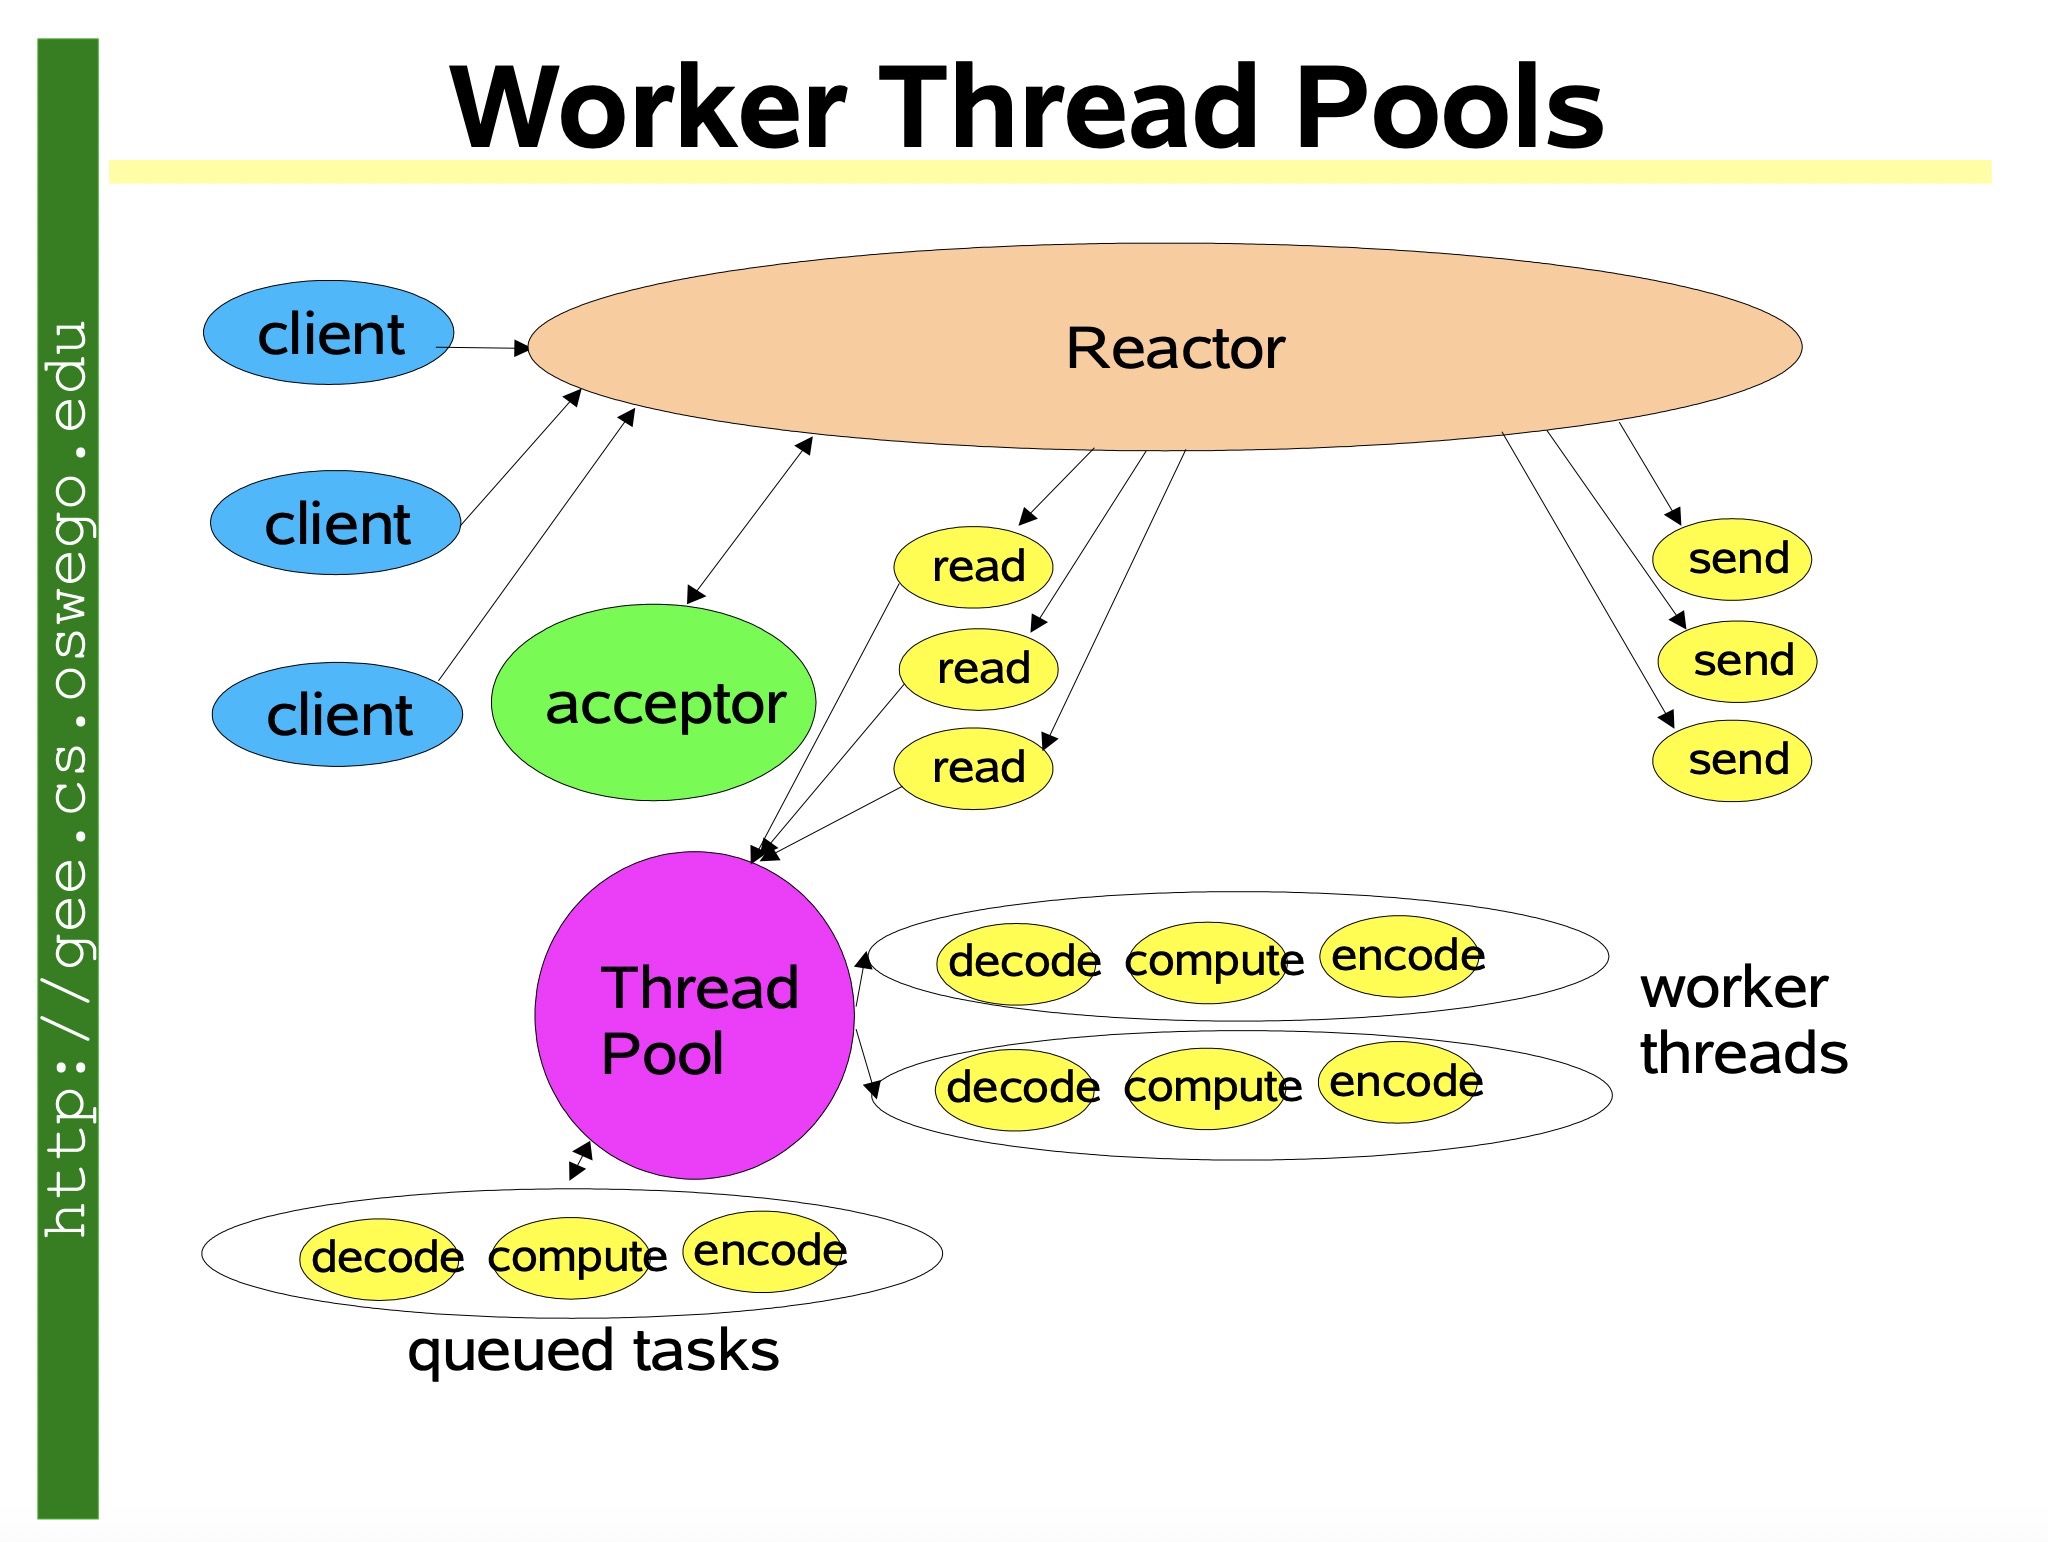
单Reactor模式:Reactor线程接收请求->分发给线程池处理请求

多Reactor模式:mainReactor接收->分发给subReactor读写->具体业务逻辑分发给单独的线程池处理
1 | package com.study.hc.net.nio; |